


Following on from last week’s guide on how to send a transaction on Cardano using python. This week we will look at the Mesh SDK for Cardano, which, similarly to PyCardano is a library for of-chain code in JavaScript and TypeScript using the Next.js framework.
So we will be using the same concepts as last week, however, we will be going one step further and integrating it into a web application.
We will cover the following:
- Setting up a Mesh app
- Connecting a wallet using a Mesh Component
- Sending a Tx using inputs via Blockfrost
- Listening for a transaction confirmation
Useful Resources:
Lets get started
First off, if you have no experience in React or Next.js is might be advisable to take a quick look at the documentation for it. To follow this guide, you don’t need to be a React wizard but without any knowledge, things like React hooks might be a bit unsettling. Although if you want to just get stuck in, go for it.
Also if you want to check your code to mine here is the GitHub link for this project
Firstly make sure you have Node.js 14.6.0 or newer installed on your machine.
Next, we are going to use one of the Mesh quick-started kits.
Open VS code or your preferred IDE and go to the folder you want the project to be stored in.
In your console, enter:
npx create-mesh-app leap -t starter -s next -l jsThis will create your mesh starter app
Install Mesh
npm install @meshsdk/core @meshsdk/reactThen type
npm run devyou should see the following
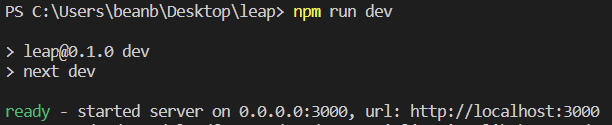
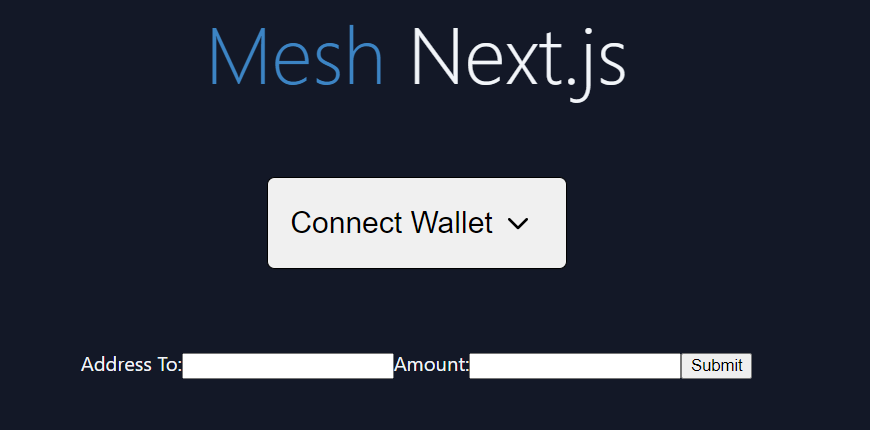
If you go to your local host URL in the Browser you will see the mesh app.
You can click the button and connect your wallet to the site now.
lets take a quick look at the code behind it
If you open index.js and scroll down a bit you will see this
This is the button component that allows you to connect your wallet, it comes with the mesh app already installed. We will be creating one of our own components later.
Below the button you can see some cards, we dont need those at the moment so those can be deleted
            Documentation

              Our documentation provide live demos and code samples; great
              educational tool for learning how Cardano works.


            Guides

              Whether you are launching a new NFT project or ecommerce store,
              these guides will help you get started.


            React components

              Useful React UI components and hooks, seamlessly integrate them
              into your app, and bring the user interface to life.
Adding our own detail
Ok, so let’s start simple, let’s display the different assets you have in your wallet on the site once a wallet is connected.
First, we need to do is listen for when a wallet gets connected.
import the useWallet function next to the other imports
import { useWallet } from '@meshsdk/react';
import React from "react";
Now in our function add the following lines
const { connected, wallet } = useWallet();
const [assets, setAssets] = React.useState(null);

React.useEffect(() => {
    if (connected) {
      getAssets();
    }
  }, [connected]);

const getAssets = async () => {
    const assets = await wallet.getBalance();
    setAssets(assets);
  };
This looks complicated but it isn’t.
Let me break this down.
The first line listens for when the wallet is connected and then changes the connected Boolean to true and sets the wallet variable to the walled for later use.
We then create a React Hook to create an assets variable. Hooks are basically simple ways to update variables when stuff happens.
The React.useEffect is just a function that runs when the connected variable is changed. This calls the getAssets function, which, as the name suggests, uses one of Mesh’s functions to get the balance of the wallet just connected and updates the assets variable.
Now we need to display the assets.
In the HTML section under the button, paste the following
{connected &&


                {JSON.stringify(assets, null, 2)}


          }
So when connected is true, print out the assets as a JSON object.
Now if you connect your wallet you should see something like the following:
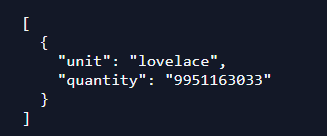
If you have different native assets in you account you will also see them listed here.
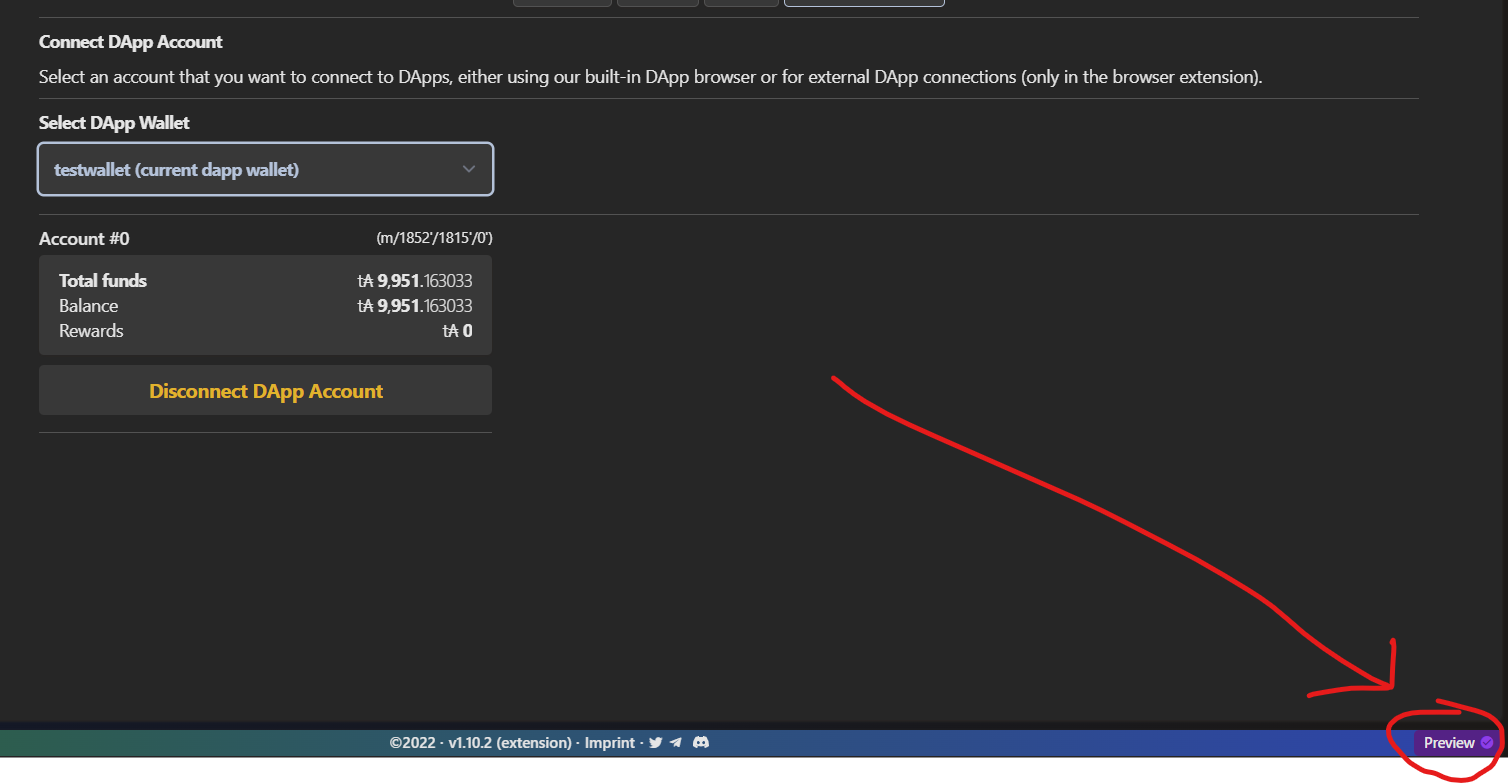
If for some reason the connection is not working, make sure to go into your wallet and set a default dapp connector account.
Now since we are wanting to send transactions, lets not use our Mainnet wallets.
Create a wallet on the preview test net. You can change the network by in Eternl by clicking in the lower left.
You will have to create a new account with a new seed phrase and all that. Just take a screenshot of your keys as security here doesn’t really matter too much as the funds are not real.
Next, send some funds to your wallet using the Faucet
We also want to have a way to check which network we are using so we don’t accidentally send real funds, add the following in your code.
const [networkId, setNetworkId] = React.useState(null);
const getNetworkId = async () => {
    const networkId = await wallet.getNetworkId();
    setNetworkId(networkId);
  };
and change the HTML element we just added to look like this:
{connected &&
          Connected wallet network: {networkId === 0 ? "Preview" : "Main net"}


                {JSON.stringify(assets, null, 2)}


          }
This way we can tell which network the connected wallet is using.
Part 2 – Sending a Transaction
So now we are going to use the connected wallet, along with an input form for the user to enter an address to send to and an amount and sign using their spending password the transaction.
We could just write all the code in the index page but that would get pretty messy, se lets use a feature of React and create a component. Just like Mesh’s connect wallet button component we will create a Transaction component.
A component is basically a snippet of code in its own file that you can bring in in many different places, kind of like a function.
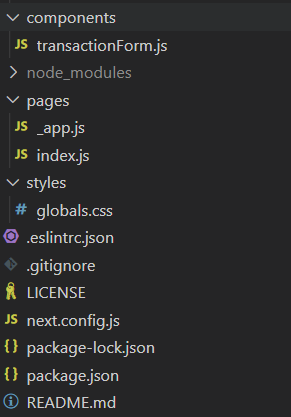
- Create a new folder called components
- Create a file named transactionForm.js
Import the following:
import { Transaction } from '@meshsdk/core';
import React from "react";
import { BlockfrostProvider } from '@meshsdk/core';
and lets set it up
export default function TransactionForm({wallet}){
return(
)
}This is the HTML for the final component, but it won’t work just yet, we need to add in some variables and transaction building first. We essentially just create two input elements and a button.
Setting up our Hooks
const blockfrostProvider = new BlockfrostProvider('YOUR_API_KEY');
const [toAddress, setToAddress] = React.useState("");
const [ammount, setAmmount] = React.useState("");
You will need a blockfrost account API key, check my previous guide if you’re struggling.
We set up a toAddress and amount.
Now we need a way of changing these variables when a user enters them in the HTML Input boxes. Under the Hooks, paste the following:
const handleAddress = (event) => {
    setToAddress(event.target.value);
  };
const handleAmmount = (event) => {
    setAmmount(event.target.value);
  };
Now if you take a look at the HTML Input boxes, you might see how these functions are linked.
Each Input element has an OnChange class which is now assigned to call these functions.
When an input is detected, it calls the respective handle function, passing in the input, which then changes the variables.
So we have the inputs stored now, lets build the TX, much like how we did it in python last week we can use MESH’s sdk in a similar way, under the handler function paste:
const sendAda = async (toAddress,ammount,wallet) => {
    const tx = new Transaction({ initiator: wallet })
    .sendLovelace(
        toAddress,
        ammount
    )
    const unsignedTx = await tx.build();
    const signedTx = await wallet.signTx(unsignedTx);
    const txHash = await wallet.submitTx(signedTx);
    console.log(txHash)
    await blockfrostProvider.submitTx(signedTx)
We pass it to our wallet, the address and amount(this is in lovelace 1000000 lovlace = 1 ADA) and then build the transaction and submit it through blockfrost.
This sendAda function is called on the button click if you look back on the HTML code.
Lastly, we need to imbed this component in the index page, we can do so simply like so
First, import the component
import TransactionForm from '../components/transactionForm'You can put this anywhere you like in the HTML code in the Index, I put it below the assets HTML block.
So this all works now and does submit a transaction. You can try it out(minimum 1000000 as the lowest transaction amount you can send) and you can check it with the python blockfrost script we wrote last week to make sure it goes on the blockchain.
You make need to restart the server by Ctrl + C then Npm run dev
However, we want to be able to do this in-app, luckily for us, MESH has a Listener to a submitted transaction.
Add the following code below the transaction function
const [message, setMessage] = React.useState("");
await blockfrostProvider.onTxConfirmed(txHash, () => {
        setMessage("Transaction Confirmed")
      });
and change the HTML
return(
{message}
)This will print out the Transaction confirmed message once the transaction is placed in the next block on chain. Be aware this may take a few seconds.
If things don’t work, take a look at my GitHub to see where you have gone wrong and make sure you have all the required packages installed. If that persists, don’t be afraid to contact me on twitter.